Do you want to build a snowman?
Well… yes I would love to, but it hardly ever snows enough in Kentucky to pull that off. So instead, I tried out some frozen bubbles!! After you give this a try, I promise you will start looking at cold days more like opportunities to play!
First things first, here is the frozen bubble recipe:
- 1 cup warm water
- 2 Tbs dish soap
- 2 Tbs Corn Syrup
- 2 Tbs sugar
- 1 straw (for blowing the bubbles)
The warm water helps the sugar dissolve a bit and I suggest the sugar being the first thing you add. After you add the rest of the ingredients, stir SLOWLY. You do not want to agitate the solution too much. Go ahead and set the solution outside while you get all your warm clothing on.
Dip the straw in the solution, and experiment with slowly blowing your bubbles. The colder your solution is and the colder the air temperature, the faster your bubbles will freeze. It just has to be below freezing for this to work.
What is really going on?
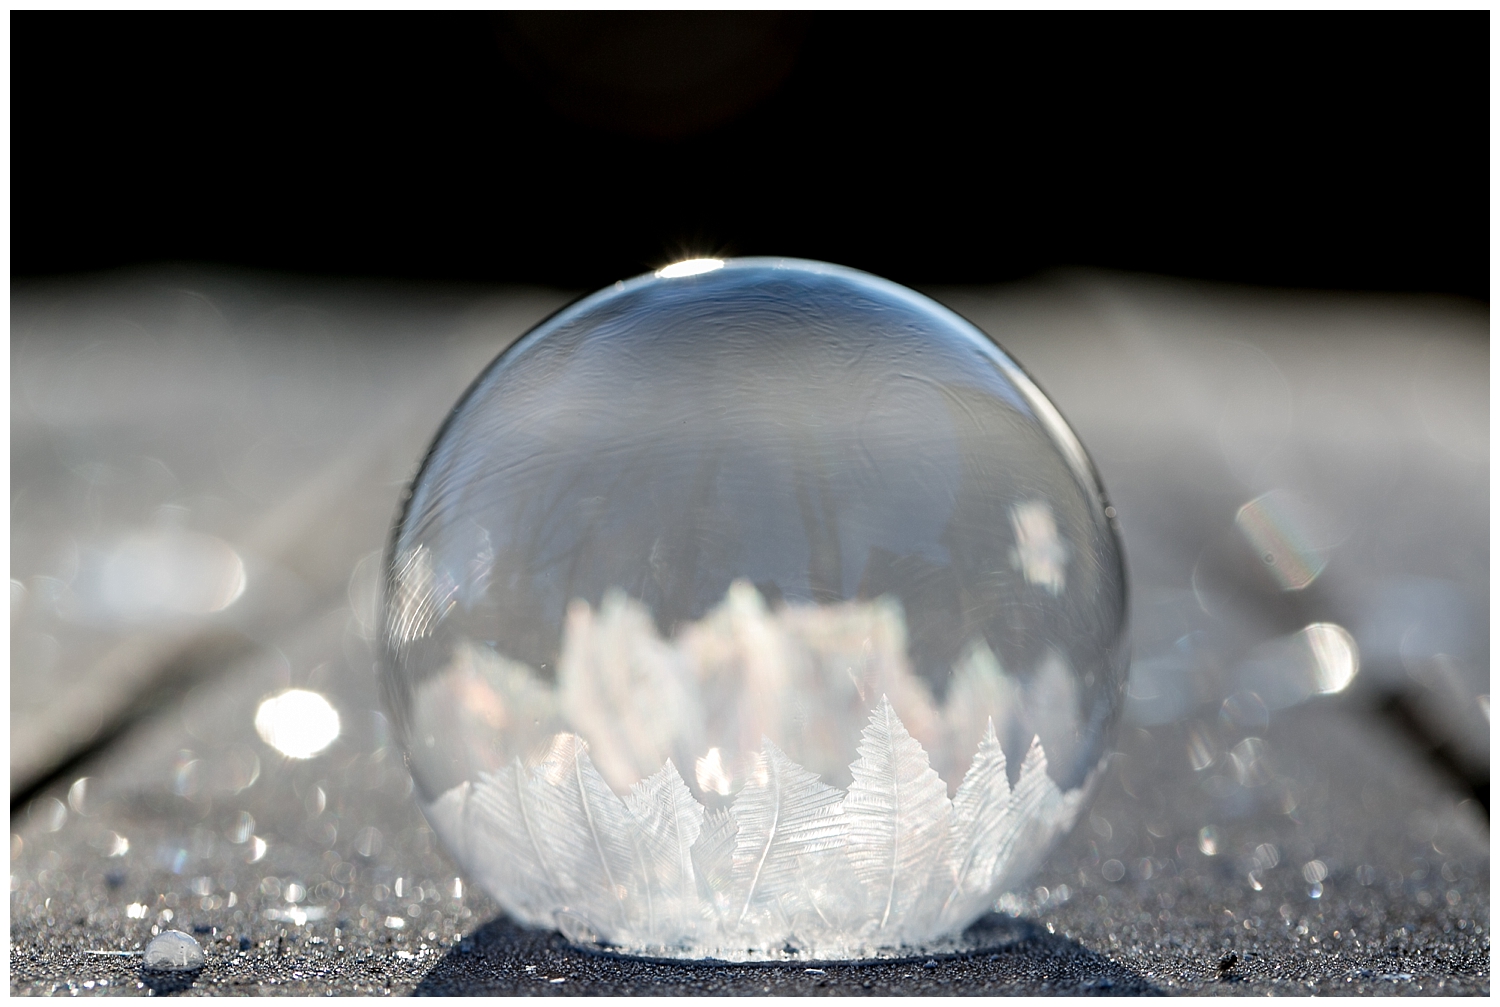
A bubble is made when a water molecule gets trapped between two fine layers of soap. Think: really gross soap sandwich. The water in between the soap is actually what is freezing. Sadly, this cannot last forever. The warm air inside the bubble soon seeks to escape (like a balloon deflating) and the bubble eventually collapses under its own weight.
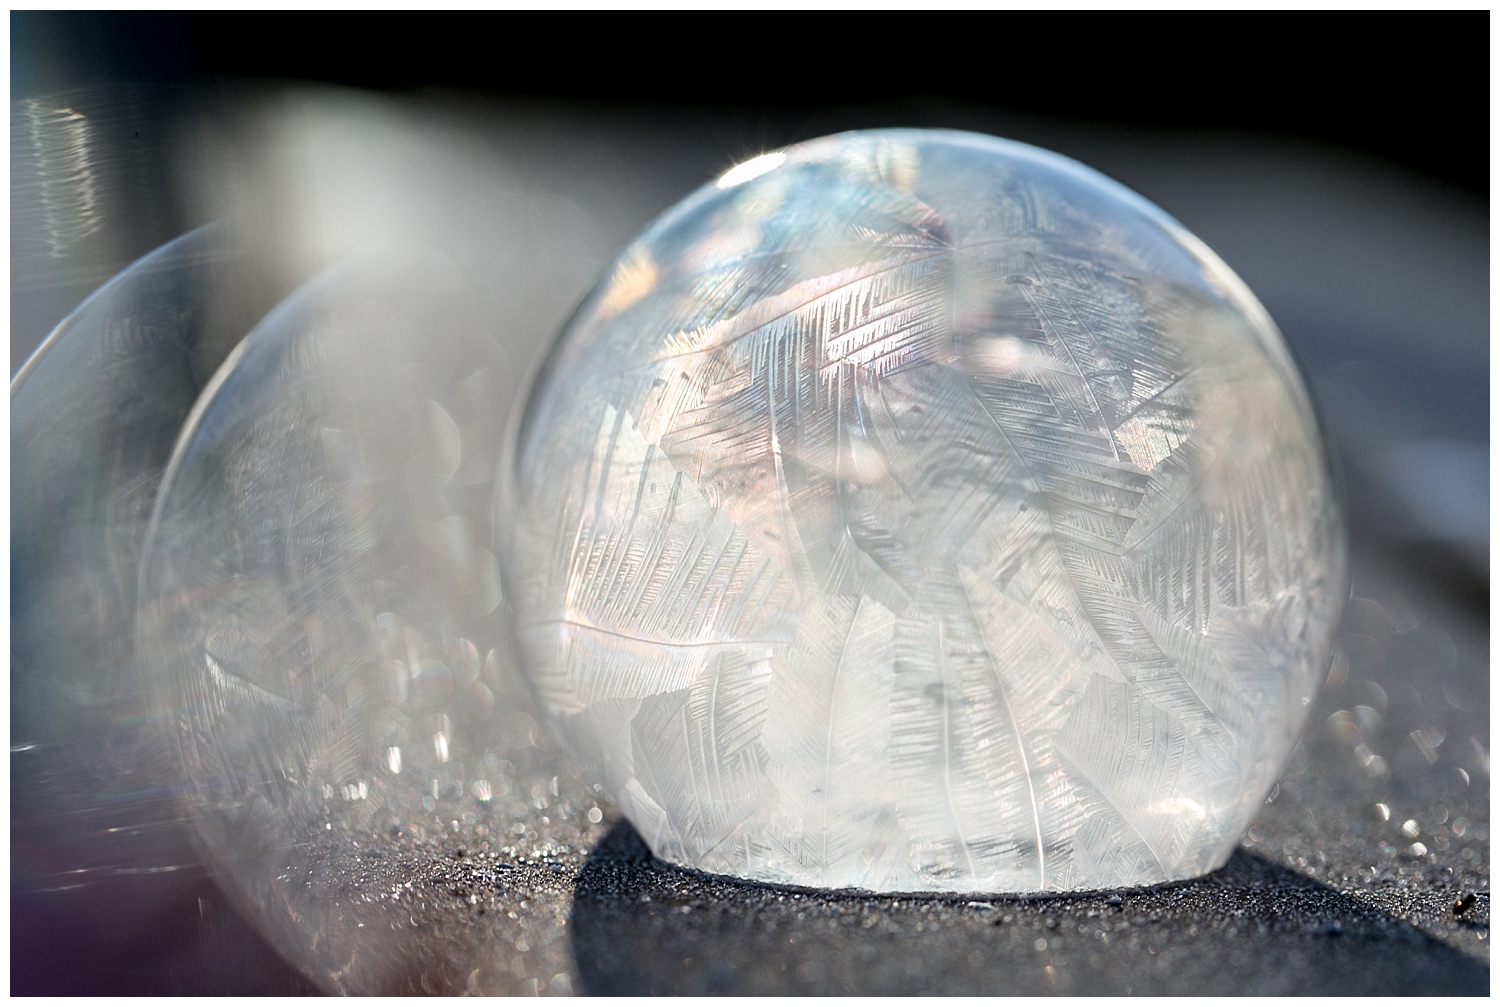
Bubble Photoshoot
This will work best with a lens that works at close range, typically called a macro lens. I use the Canon 100mm Macro. This lens works for detail shots like rings and BUBBLES, but it can also be a fun portrait lens that will give you that creamy soft compression in the background of photos.
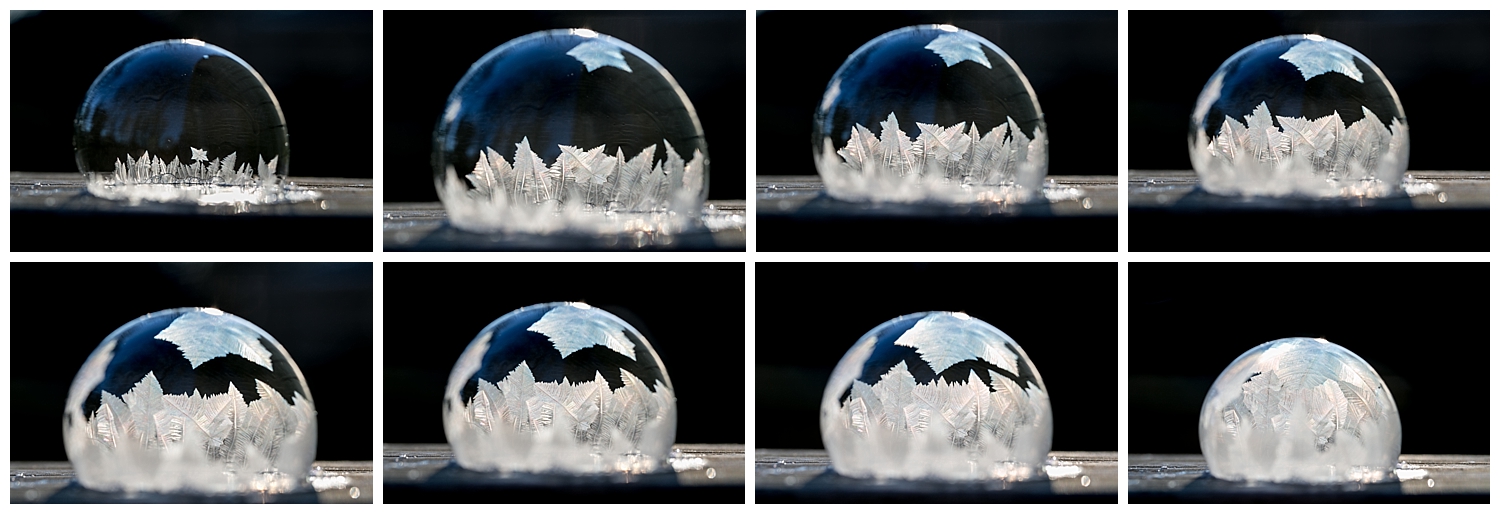
With a macro lens, I typically use a much higher f-stop tha I do with portrait photography. Most of my favorite shots were taken at f/7.1 and ISO 200. The bubbles do last around 10-20 seconds so you have a moment to set up and get the shot. Try to take photos from all around your bubble. The light makes each angle so unique!
I had the best luck shooting MANUAL focus. Yup…terrifying. But it worked the best and I got in some practice!!
Editing Frozen Bubbles
As with any type of editing, it is all up to you and your preferences. I use Adobe Lightroom for editing and found myself making the following adjustments to most of my photos:
- Increasing the clarity
- Increasing the blacks
- Using a sharpening brush on the pretty details
- Bumping the saturation up a bit to highlight the colors reflecting in the soap
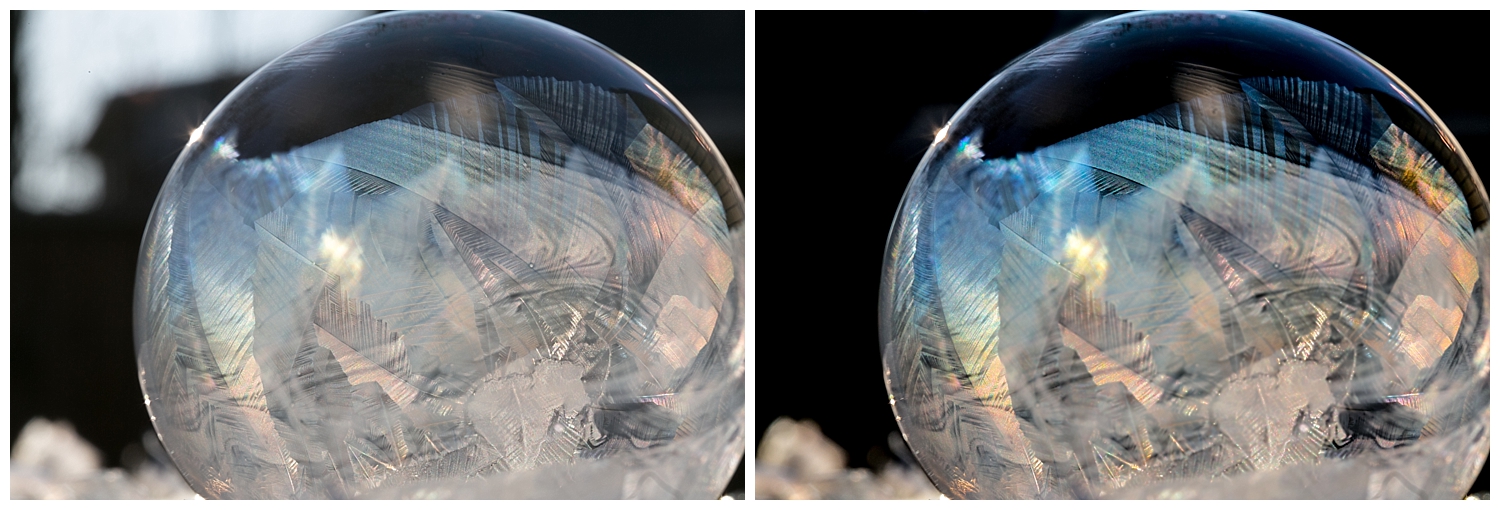
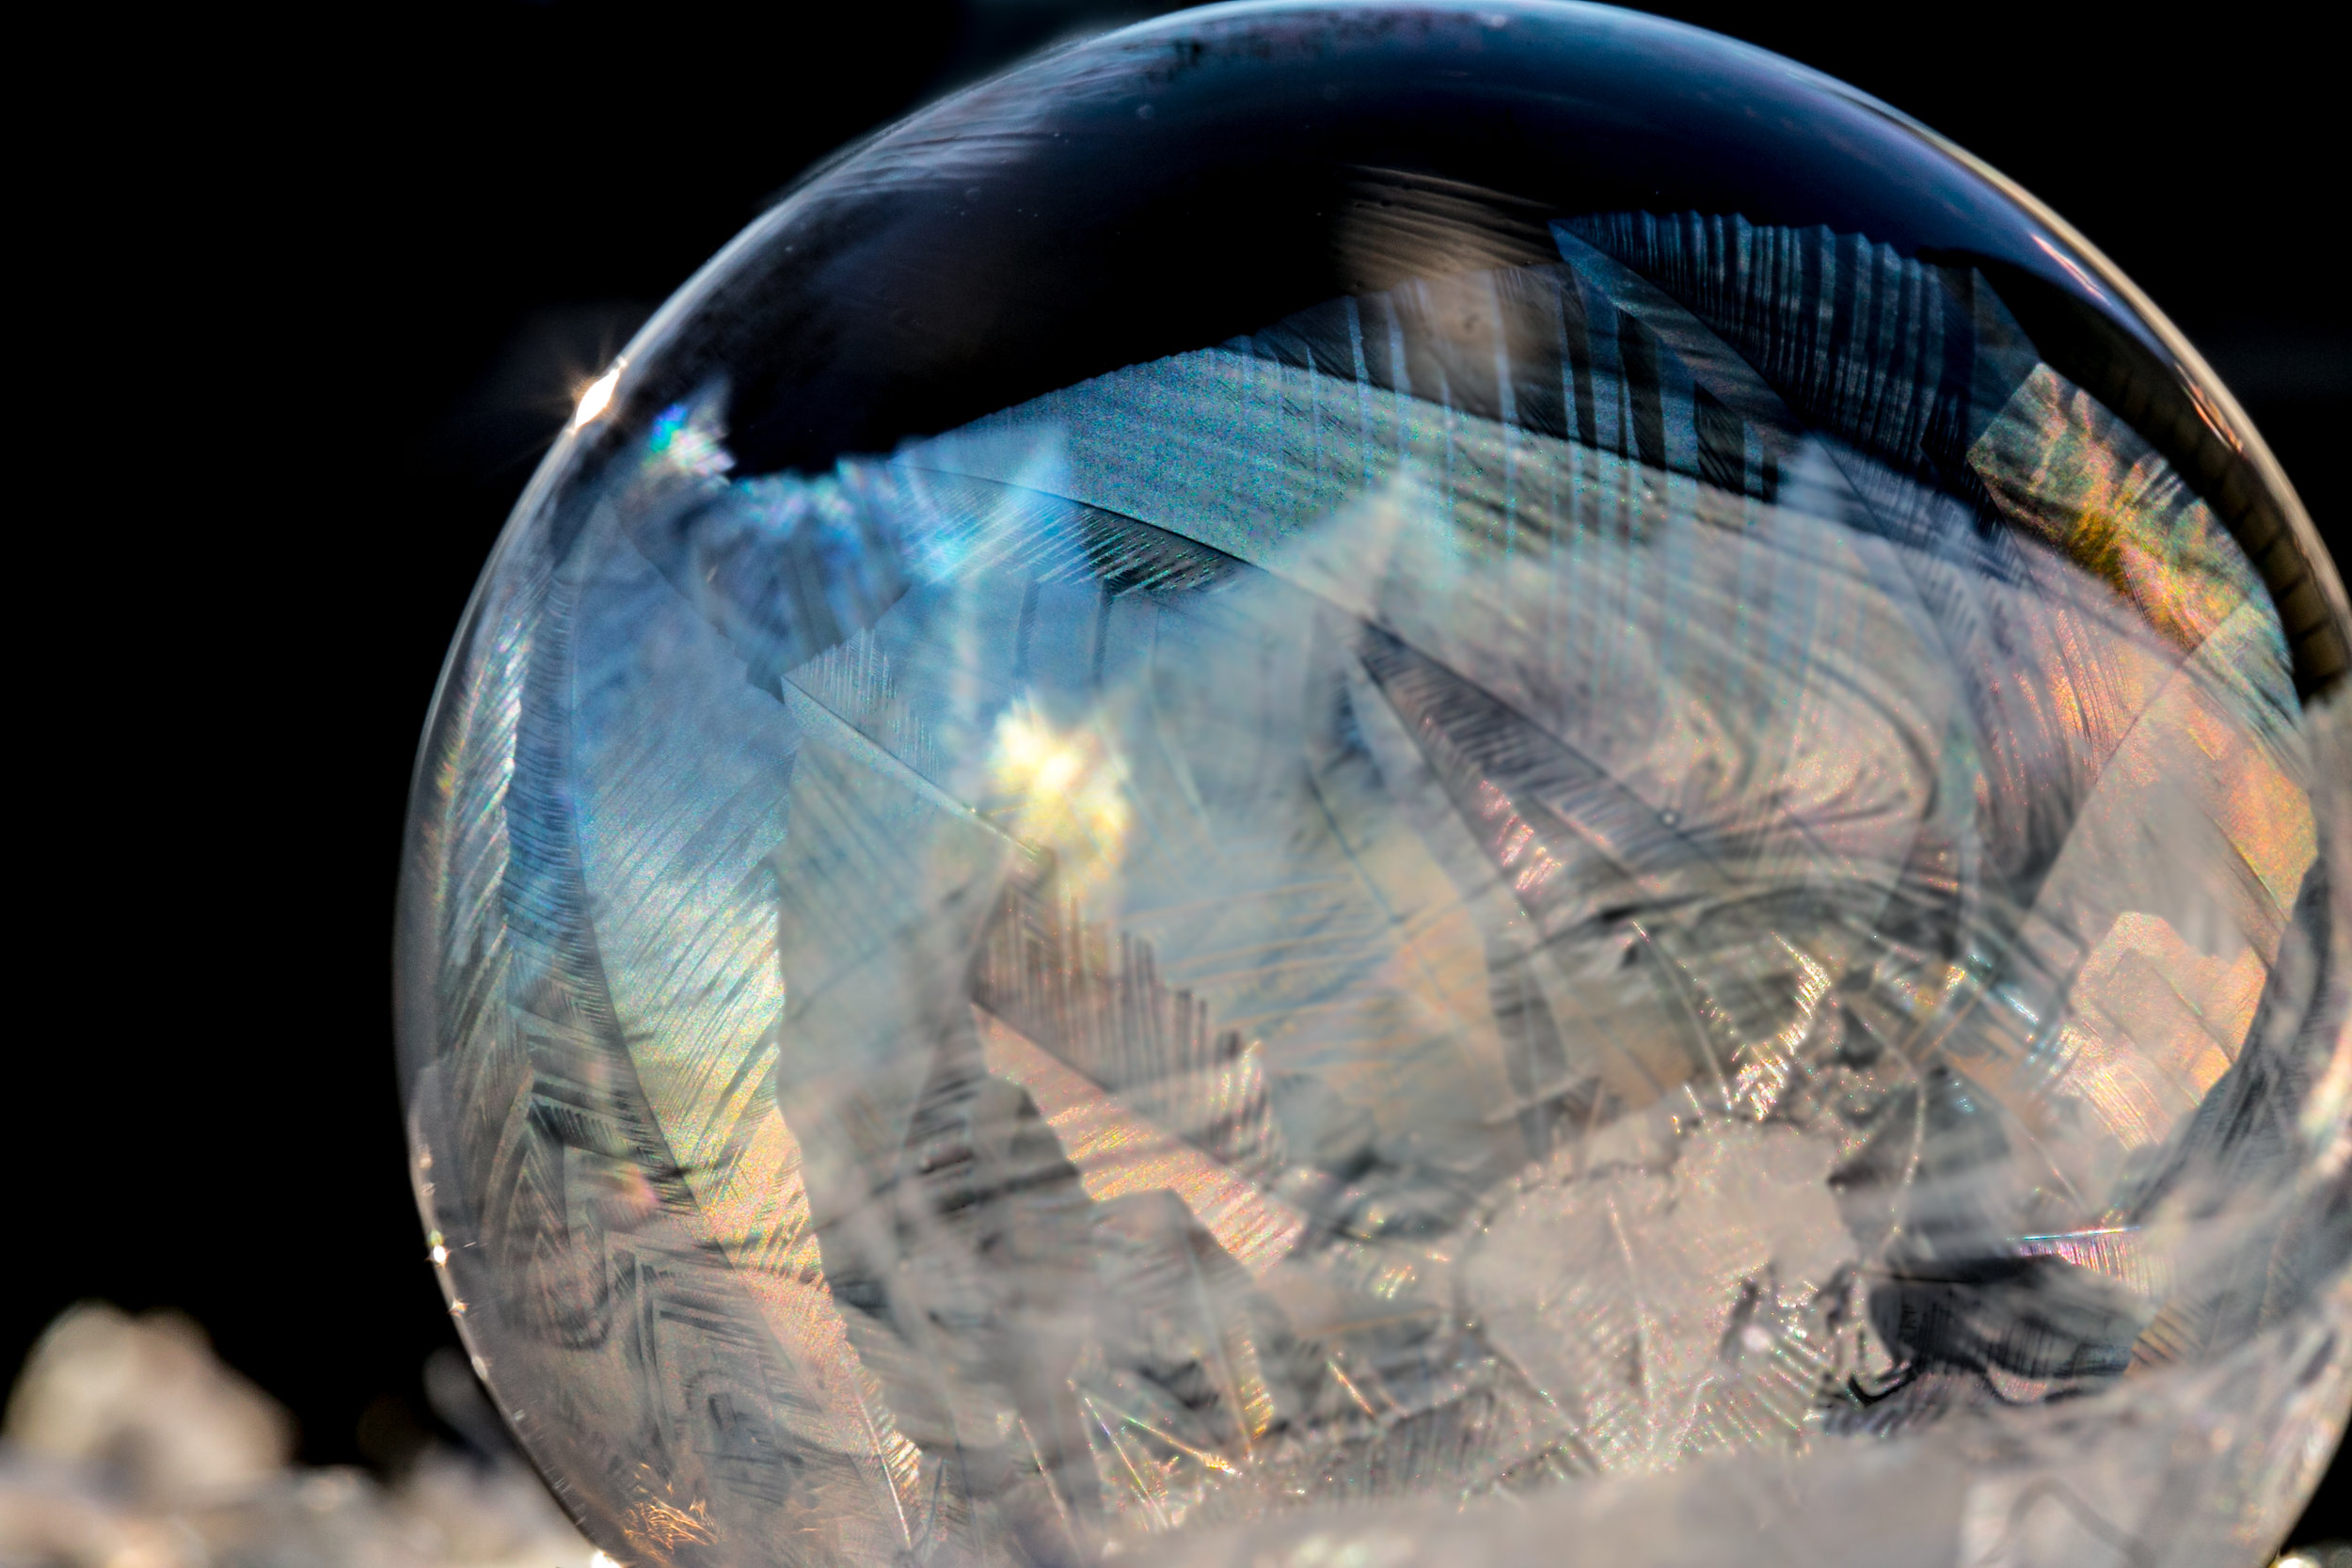
Above is an example of the image at the top of the page completely unedited and then with the adjustments mentioned above. I wanted to also get rid of the little bit of sky peaking out, so I simply chose my brush tool, lowered my exposure all the way down, and painted away! I love when I can get the look I want without leaving Lightroom!
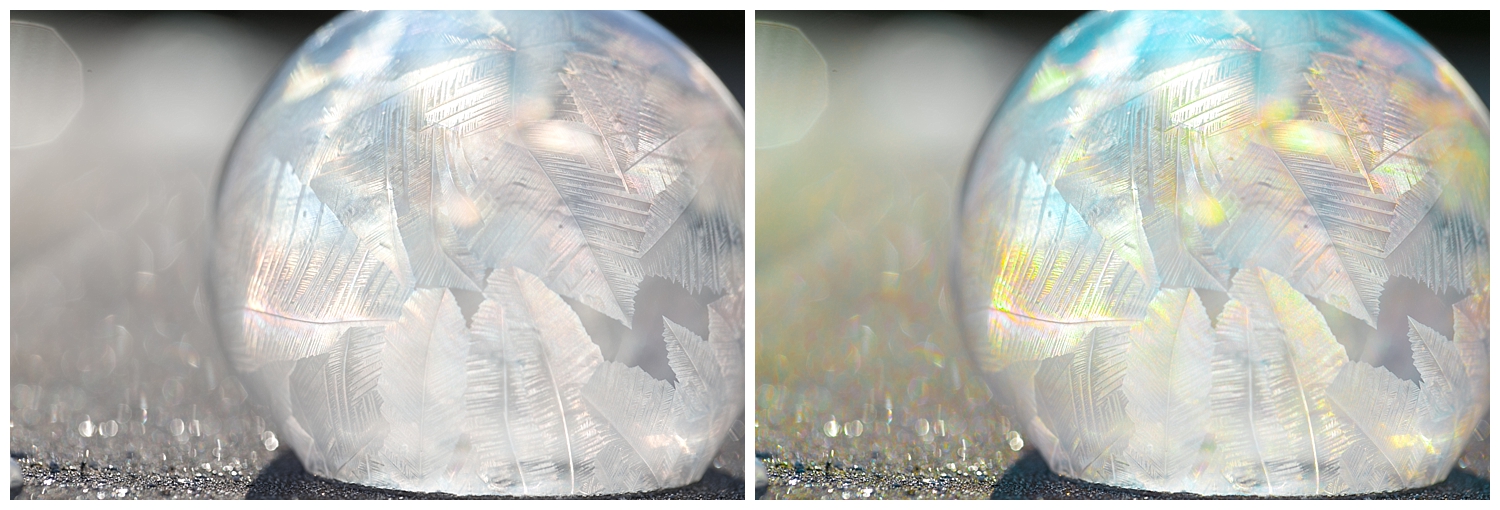
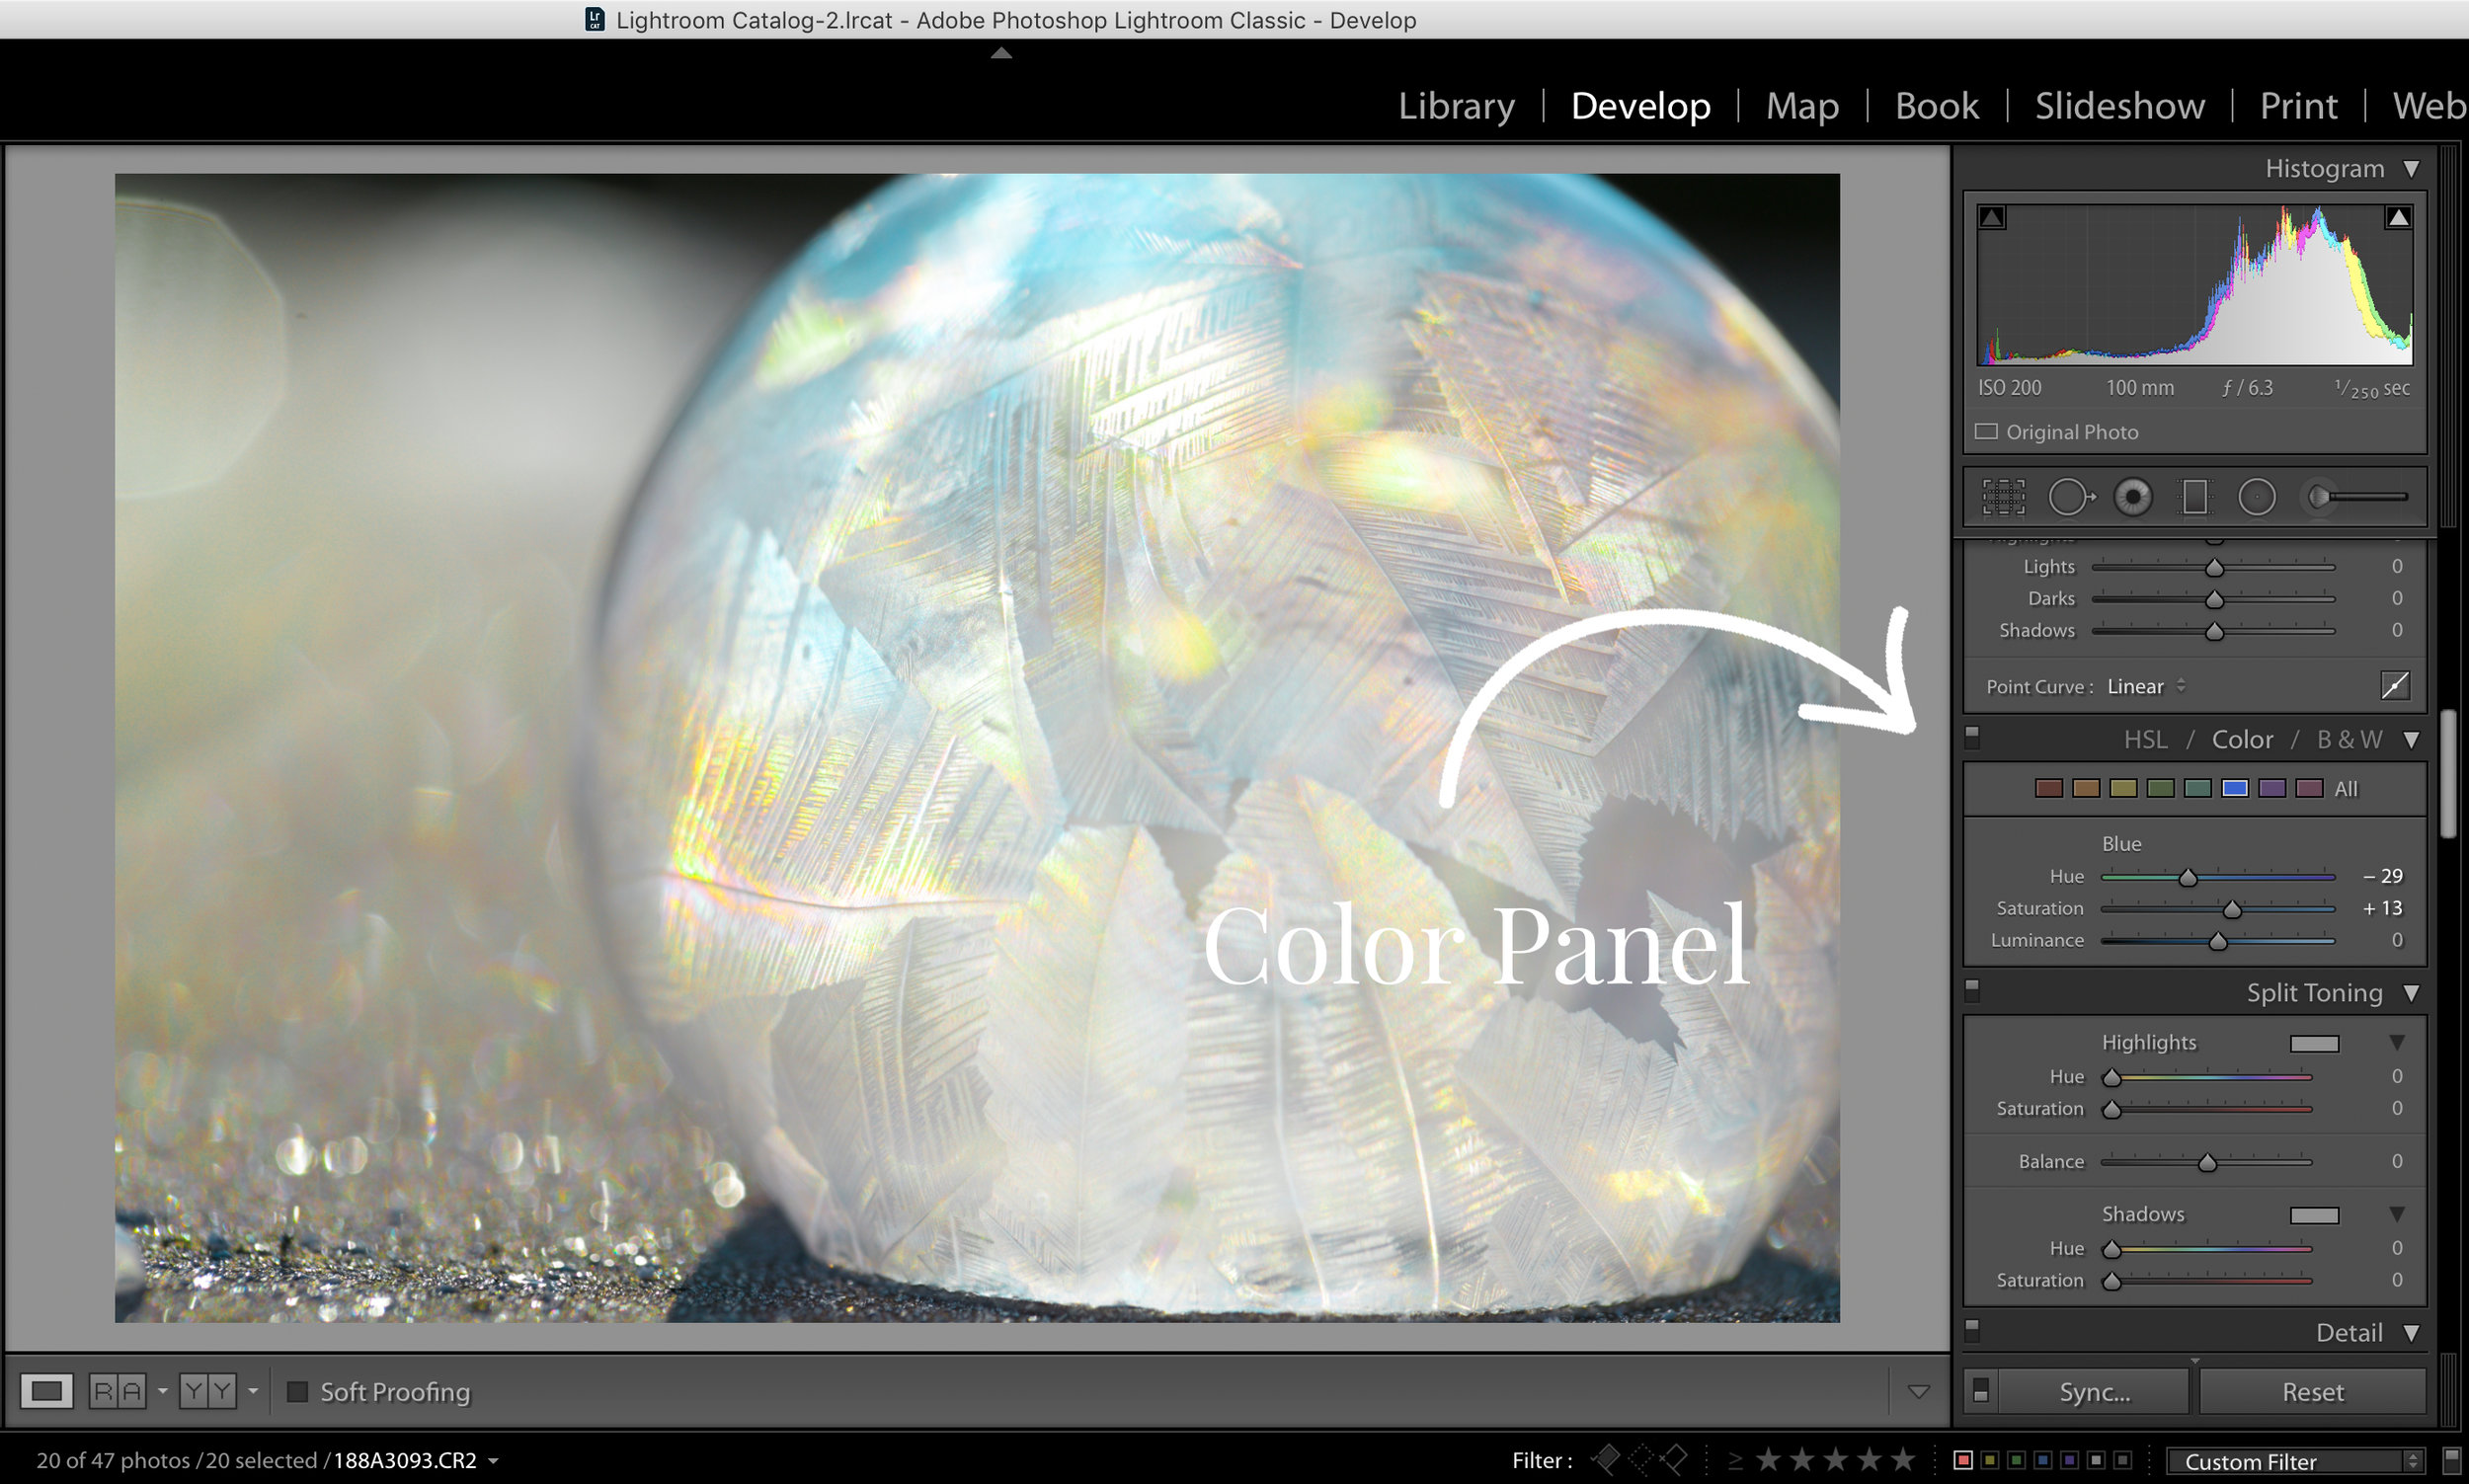
I loved playing with the colors in the bubbles. For this look, I made adjustments in the color panel in Adobe Lightroom. I increased the saturation and played with the hue for the blue, orange, and yellow tones in this photo. If you have not played around with these options in Lightroom, you can see an examples of the adjustments I made to the blue tones below. Basically, I made them much more teal and much more saturated!
Go have fun!
I hope you enjoy your frozen bubble adventures! Next up for me is giving this a go when a sunset is in the background or maybe some fun lights at night!

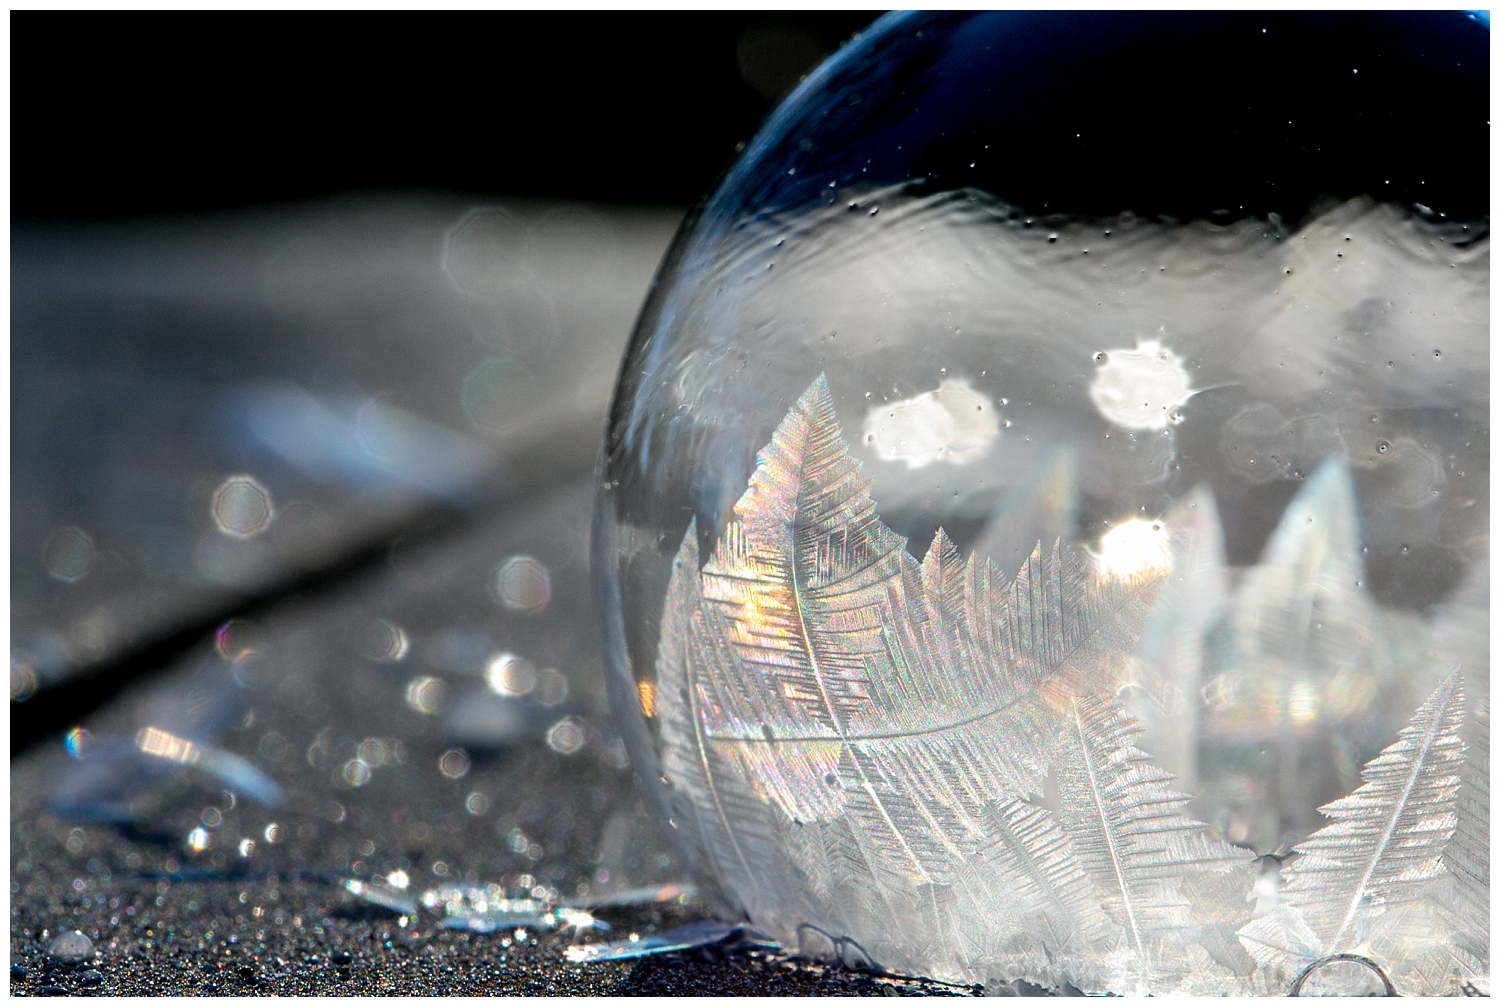
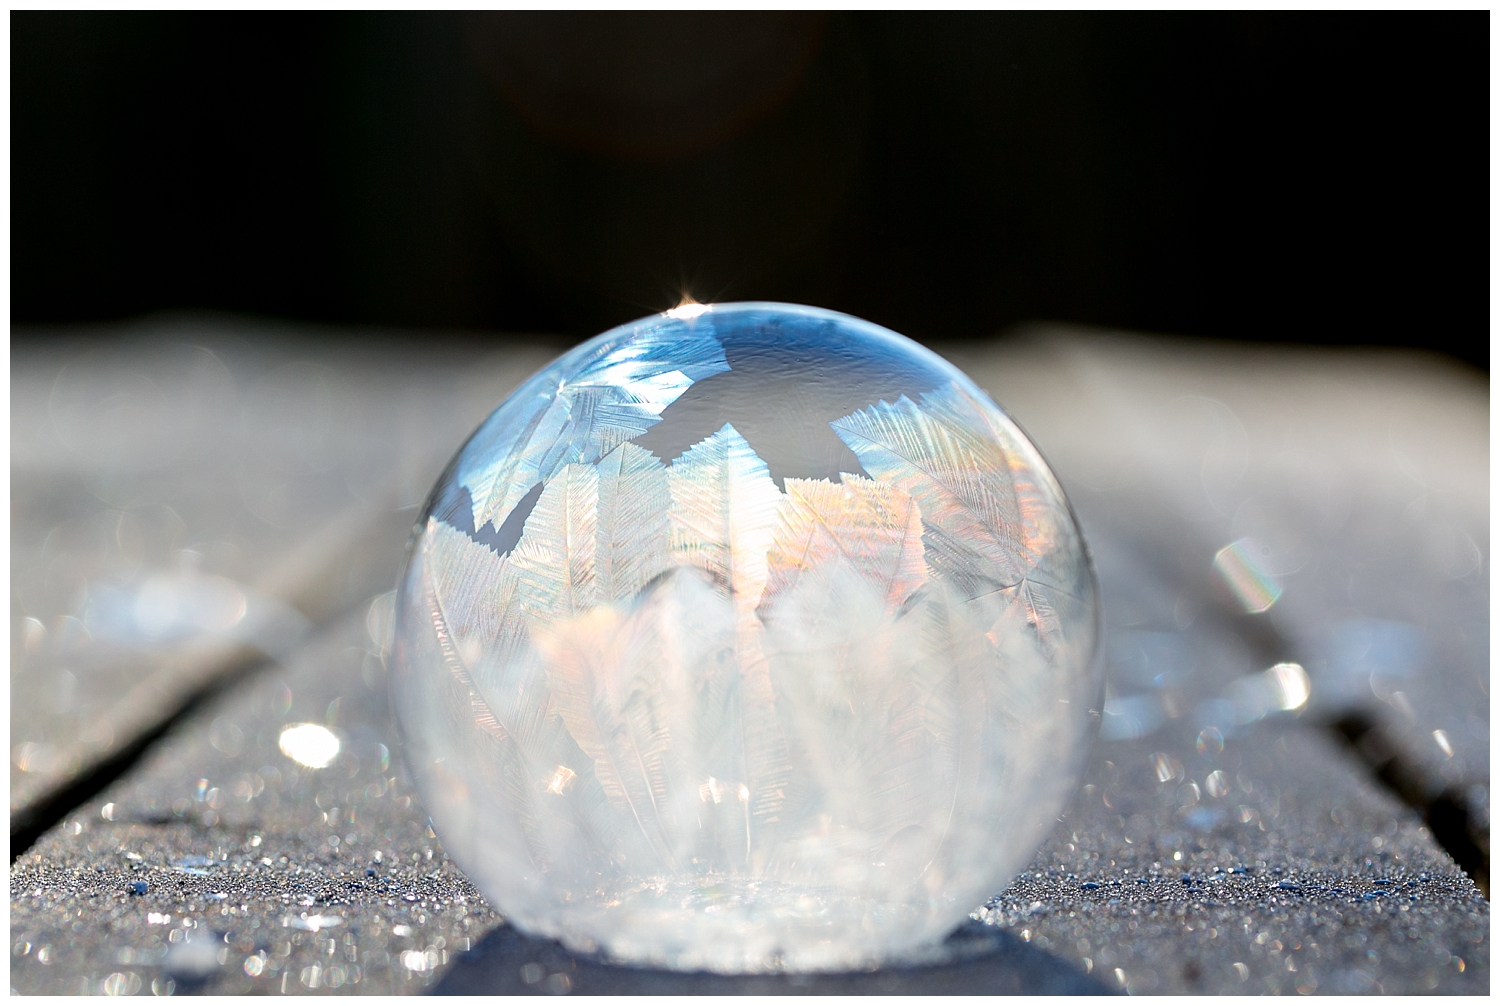
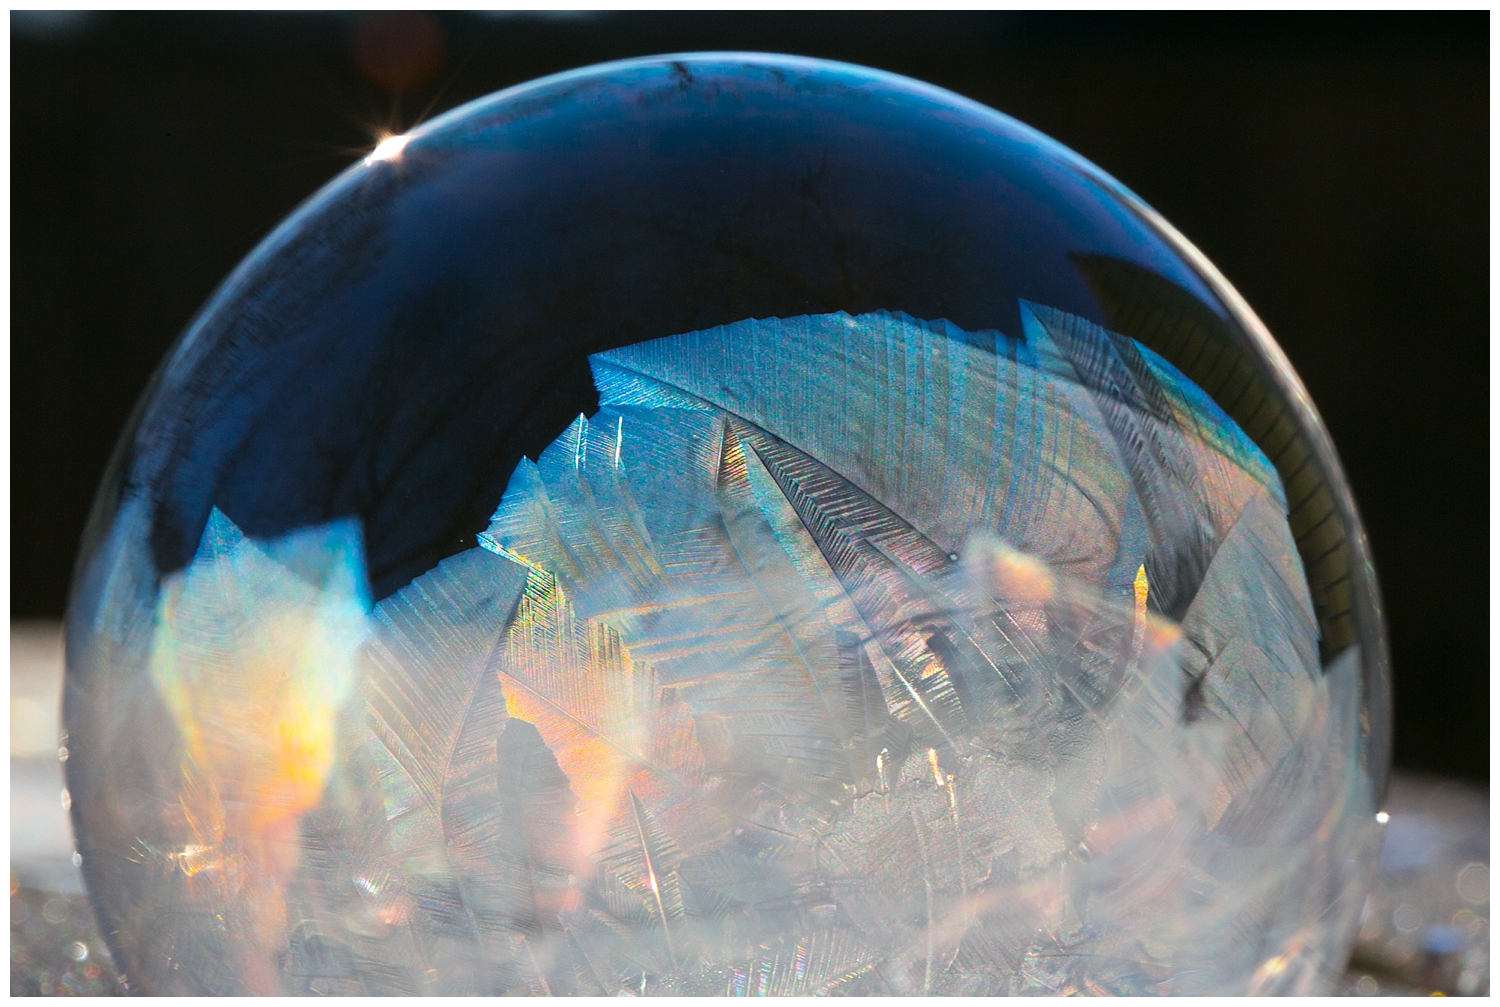
I love that you can see broken shards of previous bubbles in this one!!
Prisms always need to be part of the fun for me!